
Here we are again with the number 2 blog in a series of 4, that explains how to use your arms and shoulders and eliminate stress and tension from your whole upper back (including your shoulders, neck and head). Included in this email are detailed techniques for relieving tension in (and out of) your hot yoga class.
Need to see what I wrote last week? Here’s the link to the details:
>> https://www.hotyogadoctor.com/shoulder-breathing-your-mission/
How do you know if you’re doing it wrong or need some help?
In any case, here’s a very brief recap. So it all starts with that all too frequent command to bring your arms up over your head. Sounds simple enough. But this one action can highlight a crucial element of your practice that MUST be fixed. The way to recognize a need for change is if you have ANY pain in your upper back, head, neck or shoulders. It’s imperative to get this right.
How do YOU follow these instructions?
Most teachers will say ‘squeeze your head with your arms’ or straighten and lock out your arms’. My lengthy experience with thousands of students around the world is that they tell me that despite pain, they TRY to push through it. They are so determined to follow instructions to a ‘T’ that they will ignore the pain in pursuit of what they have been told is the ideal outcome of the pose.
In fact that’s EXACTLY what Elizabeth was doing at her studio when she approached me for help!
Maybe you’re missing this crucial step
Fortunately there is an important, if not crucial step that Elizabeth was missing. Maybe you are missing it too.
You really must know the signs; what YOU must look out for. You alone must be able to recognize when the body has gone beyond best alignment. It’s really hard sometimes because teachers can be so busy telling you their script that they don’t have the headspace to tell you the fine distinctions. Seeing yourself in the mirror often does not give you the right perspective on your position.
Unfortunately when you don’t act on the signs of tight shoulders and upper back, your body may actually seize up and get tighter. It can make progressing impossible. Worse, if you keep making the same repeated mistake you put yourself at great risk of injury.
If you’ve been going for ages and your class is still giving you satisfaction on the inside but your poses are not really getting any better, then this is probably going to open up a whole new perspective on your body and your practice.
The signs you need to look out for (and where to see it in pictures)
To work out the signs, let’s see what perfect function would look like with arms over the head.
If you own my book then you want to look at pages 43 and 64 for photos of what a tension-wracked neck looks like while doing yoga. Right next to it you’ll see that same yogi with a beautiful long stress-free neck. The difference is a simple technique tweak.
The tell-tale signs of shoulder tension
So when you have arms over head and it causes tension, this is what it ‘looks’ like:
You will see:
- Your face can actually look pained or you have a troubled expression. *In fact, in my book I didn’t ask for anyone to pull any facial expressions. You’ll see that dysfunctional form shows up as worried or troubled expressions and struggle in the body. Functional form with good instruction yields students that look calm and stress-free – regardless of immense challenge. 🙂 I was able to see tension melt and faces relax just by giving the right physical instructions (not the script).
- The chin is dropped, even a small amount. This is a sign of a tight, sore neck.
- The space between the top of the shoulders and the upper arms is very small and can even be non-existent. It most often looks like a sliver, a triangle of space just about the size of an ear.
What it should look like when you’re doing it right
- You actually look comfortable, with a calm, relaxed look on your face.
- The chin is up parallel to the floor and you are looking out directly through the center of your eyes (not from the top)
- The neck is long and free. You can see a SPACIOUS TRIANGLE of air. That triangle is bounded by the top of the shoulder, the side of the arm and the neck. That area should be more the size of a fist as seen from the side. That’s a huge difference.
OK so now you know the signs, what do you do?
- When you lift the arms, (and that is actually the subject of a completely different email, so stay tuned) allow the arms to only be as straight as they can manage without doing anything special.
- Now bring the hands together. At this stage do not straighten your arms to lock them out. What you want to do right now, is make sure the shoulder blades are pulled down and back away from the ears.
- You may even notice that when you follow these instructions that the arms have a small bend in them. This is absolutely OK and completely acceptable. In fact, as you’ll learn, it’s essential for some people for them to stay that way for quite a number of classes.
- Now, before you get worried that you’ll look oddly out of shape compared to the tall straight steeples next to you, don’t worry. The magnitude of arm bend may be tiny. So tiny in fact, that it’s almost imperceptible to you and your teacher. The are most likely not to notice anything different.
- And now, extend, lengthen the arms upward to get as straight as they can possibly get … and here’s the BIG WAIVER … if AND ONLY IF the shoulders stay seated down where you set them before.
Your neck will feel free and your breath will be much easier.
The same goes in reverse. And this is essential for your practice. If you notice at any stage that while your arms are up and straight that the shoulders rise up, even a tiny bit, OR if the chin drops even a millimeter, then your job is to:
- Micro-bend the arms until the shoulders drop easily and the chin lifts without effort (or grimace). Then lengthen the arms while maintaining that good, low, functional shoulder position.
How to make big improvements
It’s an easy formula. But it’s probably one of the biggest improvements you will make in your WHOLE practice if you start applying wherever it’s appropriate.
When Elizabeth came to me and showed me what she was doing, I could see she was really suffering in class. This was making her life hell outside of yoga too. When she tweaked her technique in the way I described above, the amount of change in her body was awesome. Instant. Lasting. Inspiring.
More than that however. The stress that Elizabeth was experiencing outside of her class was enormous. This seemingly trivial technique has made a permanent improvement to her whole life.
There is an element of this rule for every pose.
That’s right … Every. Single. Pose. And it will revolutionize your practice.
Now where else is this useful, you ask?
If you’ve ever had a (low) back ache, chances are that you’ve felt associated tightness in your upper back, shoulders and neck. Partly this is because you are tensing your muscles of your upper body to effectively lift the weight of your upper body off to lighten the load on your lower back.
Once you start to resolve the muscle pain in your upper body, then the connected lower back starts to resolve too. That’s why lying down when you have a back ache can help so much. The bed supports you without you making any effort and so your shoulders and neck can get some rest too.
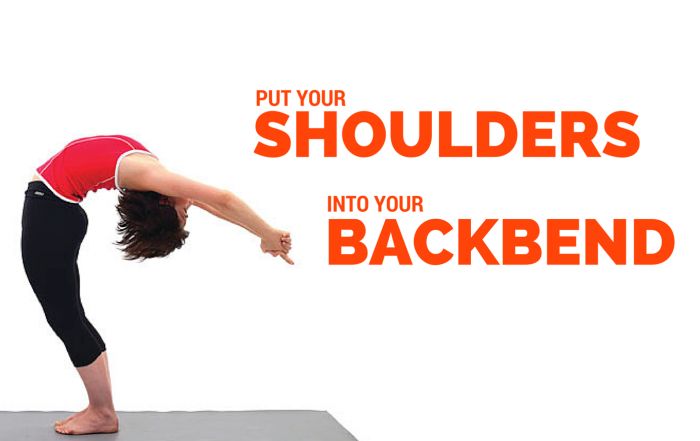
Shoulders in Pranayama and Backbends
In the coming 2 blogs, over the next couple of weeks or so, I will step you right through some of the shoulder and neck issues with Pranayama breathing and with the all-important backbends that you have through your class. And I will give you a couple of wonderful antidotes to poor posture that you can TEACH ANYONE, anytime, in or out of the yoga room! Now that’s impressive.
Just know that what I have told you above is a central key to your practise improvement. If you keep your arms straight before they’re ready and your neck is not long and you’re wearing your shoulders like earrings, you will NOT, EVER resolve this problem.
On the contrary, if you micro-bend and attend to your shoulder and neck muscles, over a very short amount of time your arms will start to straighten and your shoulders will stay down. You will look as cool as a cucumber, relaxed and stress-free, with a graceful and beautifully long neck and you’ll stay focused and calm even in the most challenging poses.
And there you’ll be … with your arms straight, locked out, squeezed to the side of your head and your chin up; tall, relaxed and completely stress-free. It doesn’t get much better than that.
Namaste
Gabrielle 🙂
PS: If you’re not using the Hot Yoga MasterClass as a transformational resource, you might be making many more mistakes – without realizing it. Why not check it out now? You owe it to your body 🙂
<http://www.hotyogamasterclass.com/>
(If you already own it, then you know what to do!)


Leave A Comment